Enable SSH root login on Debian Linux Server
After fresh system installation the root login on the Debian Linux is disabled by default. When you attempt to login as root user to your Debian Jessie Linux server the access will be denied eg.:
$ ssh root@10.1.1.12
root@10.1.1.12‘s password:
Permission denied, please try again.
root@10.1.1.12‘s password:
Permission denied, please try again.
root@10.1.1.12‘s password:
Permission denied (publickey,password).
To enable SSH login for a root user on Debian Linux system you need to first configure SSH server. Open /etc/ssh/sshd_config and change the following line:
- LOGIN AS USER
- su
- give root pw
- root@websites-vm-2:~#
- nano /etc/ssh/sshd_config
FROM:
PermitRootLogin without-password
TO:
PermitRootLogin yes
Once you made the above change restart your SSH server:
# /etc/init.d/ssh restart
[ ok ] Restarting ssh (via systemctl): ssh.service.
From now on you will be able to ssh login as a root:
$ ssh root@10.1.1.12
root@10.1.1.12‘s password:
The programs included with the Debian GNU/Linux system are free software;
the exact distribution terms for each program are described in the
individual files in /usr/share/doc/*/copyright.
Debian GNU/Linux comes with ABSOLUTELY NO WARRANTY, to the extent
permitted by applicable law.
Install sudo
apt-get install sudo
Change DHCP to Static IP
If the Ubuntu Server installer has set your server to use DHCP, you will want to change it to a static IP address so that people can actually use it.
Changing this setting without a GUI will require some text editing, but that’s classic linux, right?
Let’s open up the /etc/network/interfaces file. I’m going to use vi, but you can choose a different editor
sudo nano /etc/network/interfaces
For the primary interface, which is usually eth0, you will see these lines:
auto eth0
iface eth0 inet dhcp
As you can see, it’s using DHCP right now. We are going to change dhcp to static, and then there are a number of options that should be added below it. Obviously you’d customize this to your network.
auto eth0iface eth0 inet staticaddress 192.168.1.100netmask 255.255.255.0network 192.168.1.0broadcast 192.168.1.255gateway 192.168.1.1dns-nameservers 192.168.1.1
Now we’ll need to add in the DNS settings by editing the resolv.conf file:
sudo nano /etc/resolv.conf
On the line ‘name server xxx.xxx.xxx.xxx’ replace the x with the IP of your name server. (You can do ifconfig /all to find out what they are)
Now we’ll just need to restart the networking components:
sudo /etc/init.d/networking restart
Install LAMP
How To Install Linux, Apache, MySQL, PHP (LAMP) stack on Debian
Posted Oct 4, 2012 482.2kviews Debian
About LAMP
LAMP stack is a group of open source software used to get web servers up and running. The acronym stands for Linux, Apache, MySQL, and PHP. Since the virtual private server is already running Debian, the linux part is taken care of. Here is how to install the rest.
Set Up
Before running through the steps of this tutorial, make sure that all of your repositories are up to date:
apt-get update
With that completed, go ahead and start installing the LAMP server.
Step One—Install Apache
Apache is a free open source software which runs over 50% of the world’s web servers.
To install apache, open terminal and type in these commands:
apt-get install apache2
That’s it. To check if Apache is installed on your VPS, direct your browser to your server’s IP address (eg. http://12.34.56.789). The page should display the words “It works!” like this.
How to Find your Server’s IP address
You can run the following command to reveal your VPS’s IP address.
ifconfig eth0 | grep inet | awk '{ print $2 }'
Step Two—Install MySQL
MySQL is a widely-deployed database management system used for organizing and retrieving data.
To install MySQL, open terminal and type in these commands:
apt-get install mysql-server mysql-client
During the installation, MySQL will ask you to set a root password. If you miss the chance to set the password while the program is installing, it is very easy to set the password later from within the MySQL shell.
Once you’re done with that you can finish up by installing PHP on your virtual server.
Step Three—Install PHP
PHP is an open source web scripting language that is widely use to build dynamic webpages.
To install PHP, open terminal and type in this command. Note: If you are on a version earlier than Debian 7, include php5-suhosin as well.
apt-get install php5 php-pear php5-mysql
After you answer yes to the prompt twice, PHP will install itself.
Finish up by restarting apache:
service apache2 restart
Congratulations! You now have LAMP stack on your droplet!
Step Four—RESULTS: See PHP on your Server
Although LAMP is installed, we can still take a look and see the components online by creating a quick php info page
To set this up, first create a new file:
nano /var/www/html/info.php
Add in the following line:
<?php
phpinfo();
?>
Then Save and Exit.
Finish up by visiting your php info page (make sure you replace the example ip address with your correct one): http://12.34.56.789/info.php
It should look something like this:
Step Five – Install PhpMyAdmin
apt-get install phpmyadmin
Give password to root user and other users same as mysql root user
Login to phpmyadmin
http://VM-ip/phpmyadmin
user : root
pw : same as mysql and phpmyadmin root user
Allow root user without password in php my admin
Login in phpmyadmin from browser
Click users
There will be 4 root entries
Edit Privileges
Click on change password
Set no password
Click GO
Same with other entries of root entry
If you try to login without password in php my admin from web browser
It will give following error
Login without a password is forbidden by configuration (see AllowNoPassword)
The Solution
Enabling the ability to manage MySQL via phpMyAdmin (when the root login is passwordless) is as easy as changing one line in a configuration file.
We’ll set the AllowNoPassword variable, located in phpMyAdmin’s configuration file, to TRUE. On an Ubuntu 15.04 server edit the following file:
nano /etc/phpmyadmin/config.inc.php
For a refresher on editing files with vim see: New User Tutorial: Overview of the Vim Text Editor
Find the line:
// $cfg[‘Servers’][$i][‘AllowNoPassword’] = TRUE;
Uncomment that line; you’ll remove the //.
There are two instances of this line in the configuration file… be SURE to uncomment both of them!
Exit and save the file with the command :wq.
Be Sociable, Share!
1 Preliminary Note
I’m using a Debian 8 system here with the hostname debian.example.com and the IP address 192.168.1.100.
I will use the nano editor in this tutorial to edit config files on the shell. Nano can be installed with the command:
apt-get install nano
If you have a different favorite shell editor like joe or vi, then use that instead.
To make the Linux server accessible by name from my Windows workstation, I will add a line to the hosts file on Windows. Run this command as Administrator user on Windows:
notepad C:\Windows\System32\drivers\etc\hosts
and add a line like this:
192.168.1.100 debian.example.com debian
at the end of the file. Replace the IP address with the server IP and the hostname with the hostname that you have chosen for your server.
2 Installing Samba
Connect to your server on the shell as root user and install the Samba packages:
apt-get install libcups2 samba samba-common cups
Move the current smb.conf file to smb.conf.bak:
mv /etc/samba/smb.conf /etc/samba/smb.conf.bak
And then create a new file smb.conf file:
nano /etc/samba/smb.conf
With the following content:
[global]

workgroup = WORKGROUP

server string = Samba Server %v

netbios name = debian

security = user

map to guest = bad user

dns proxy = no
Replace WORKGROUP with the workgroup name that is used on your Windows clients. If you don’t know the name of the workgroup, run this command on the Windows client to get the workgroup name:
net config workstation
Then close the Samba configuration file on the server and restart Samba:
systemctl restart smbd.service
3 Adding Samba Shares
Now I will add a share that is accessible by all users.
Create the directory for sharing the files and change the group to the users group:
mkdir -p /home/shares/allusers
chown -R root:users /home/shares/allusers/
chmod -R ug+rwx,o+rx-w /home/shares/allusers/
mkdir -p /home/shares/anonymous
chown -R root:users /home/shares/anonymous/
chmod -R ug+rwx,o+rx-w /home/shares/anonymous/
At the end of the file /etc/samba/smb.conf add the following lines:
nano /etc/samba/smb.conf
3.1 Group share
This is a share that is accessible and writable for all members of our “users” group. Add the following config at the end of the smb.conf file.
[allusers]
comment = All Users
path = /home/shares/allusers
valid users = @users
force group = users
create mask = 0660
directory mask = 0771
writable = yes
3.2 Home directories
If you want all users to be able to read and write to their home directories via Samba, add the following lines to /etc/samba/smb.conf (make sure you comment out or remove the existing [homes] section):
[homes]
comment = Home Directories
browseable = no
valid users = %S
writable = yes
create mask = 0700
directory mask = 0700
3.3 Anonymous share
You like to have a share were all users in your network can write to? Be careful, this share is open to anyone in the network, so use this only in local networks. Add an anonymous share like this:
[anonymous]
path = /home/shares/anonymous
   force group = users

   create mask = 0660

   directory mask = 0771

   browsable =yes
writable = yes
guest ok = yes
Now we restart Samba:
systemctl restart smbd.service
4 Adding and Managing Users
In this example, I will add a user named tom. You can add as many users as you need, in the same way, just replace the username tom with the desired username in the commands.
useradd tom -m -G users
Set a password for tom in the Linux system user database. If the user tom should not be able to log into the Linux system, skip this step.
passwd tom
-> Enter the password for the new user.
Now add the user to the Samba user database:
smbpasswd -a tom
-> Enter the password for the new user.
Now you should be able to log in from your Windows workstation with the file explorer (address is \\192.168.1.100 or \\192.168.1.100\tom fortom‘s home directory) using the username tom and the chosen password and store files on the Linux server either in tom‘s home directory or in the public shared directory.
5 Accessing Samba from Windows
Now you can access the samba shares from your Windows Desktop. Open the command prompt and enter “//debian” to open a file explorer:
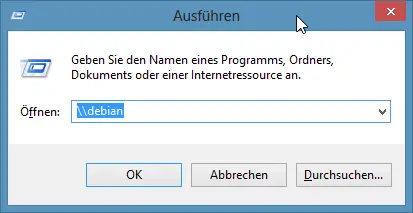
That shows the shares of our samba server.
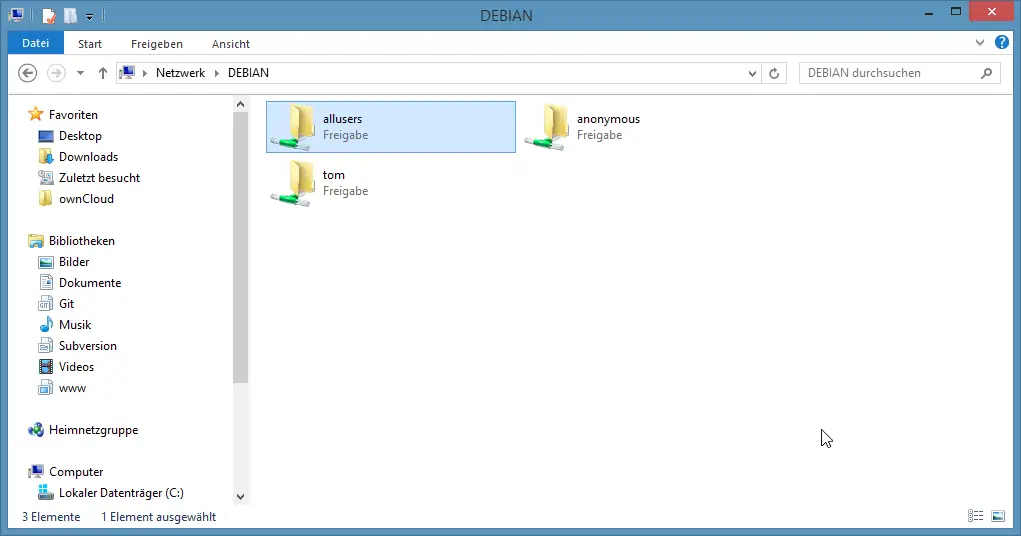
List directory with size in gb
ls -lh
Disk size and used
df -h
Remove all files and folders
rm -r *